I'm Marie, a brand and web designer committed to help female entrepreneurs on their road to success.
Need a New
Website?
Custom Brand
and Web Design
So you just bought a new website template or want to refresh your current website, but you’re wondering how to add a custom font to your Showit website? It’s actually really easy. In this article, I’ll cover the exact steps you need to take in order to upload your pretty brand fonts to your Showit website.
Step 1: Convert your font to a webfont version
When you purchase a custom font, you can usually choose between a desktop license or a webfont license. Chances are, if you select a webfont license you will immediately get a .WOFF file. This is the file type that you need in order to add your custom font to your Showit website.
If you don’t have a .WOFF file yet, but a .TTF or .OTF file, no worries. You can easily convert your font file to a webfont file using a free website like Cloud Convert.
At the top, simply select OTF or TTF in the first drop-down menu, and convert to WOFF.
Now, you can click the red “Select file” button and select your font file from your computer. Then you’ll click the “convert” button and wait for your font to be converted.
Once this is done, click the green “download” button and save your new file to your computer. Easy!

Step 2: Upload your font to Showit
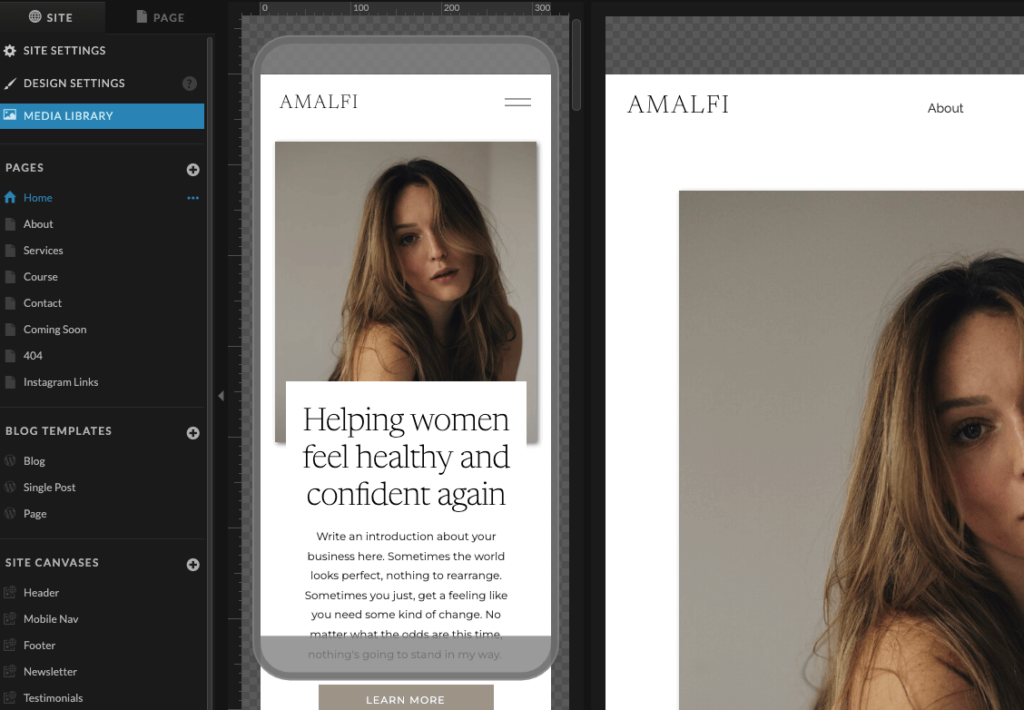
Now it’s time to upload your new .WOFF file to your Showit account. For this, simply open up your Showit app and click on “Media Library” at the top left. Then, drag and drop your font file from your computer into your media library and close it.

Step 3: Add your custom font to your Showit website
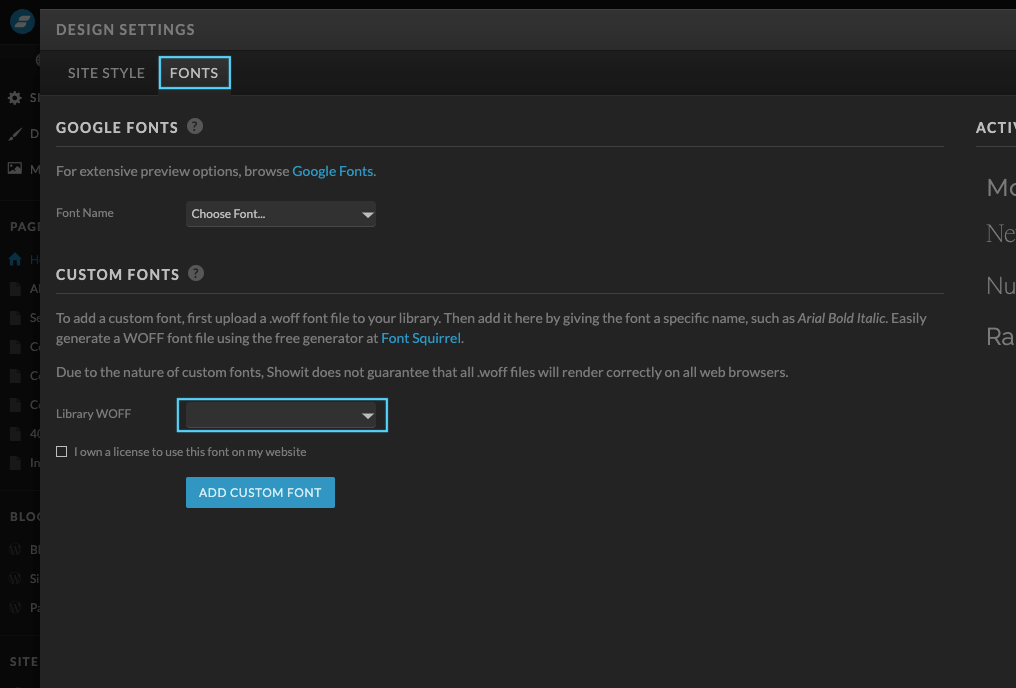
Next, click on “Design settings” at the top right and click the “Fonts” tab. From there, go to the part where it says “Custom fonts” and select your new font from the drop-down menu and give it a name.
You will also need to tick the box that states you are using this font legally. If you’re unsure, you can contact the font owner to make sure you own the rights to use this font on your website.
Then, click the blue “Add custom font” button, and don’t forget to save. Your custom font is now added to your website, but it’s not completely done yet.

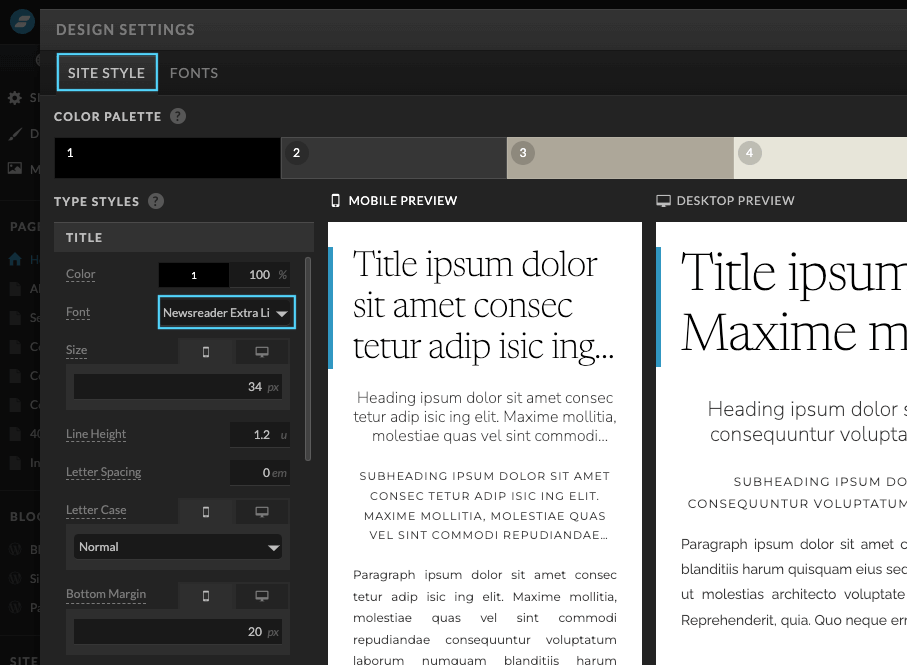
In order to have your new font display on your website, go back to the design settings and this time select the tab “Site style”.
In the drop-down menu, you can select your new font and apply it as a style font for your titles, headings, subheadings, or paragraphs.
This last step is to ensure you won’t have to adapt your fonts manually throughout your website, but that it will automatically update the font styles.
I hope you enjoyed reading this little tutorial and that it was helpful for you to add your custom fonts to your website.

Where to find gorgeous fonts?
If you’re looking for more custom fonts, I highly recommend checking out Creative Market or type font designers such as Jen Wagner Co. There are countless of fonts to choose from at an affordable price.
ABOUT STUDIO IVORY
Studio Ivory offers Custom Brand and Web Design Services. I specialize in working with female-led businesses throughout the world. Whether you are just starting out or you are a more established brand, you can hire me to elevate your business through a custom brand and web design experience. I would love to hear more about your vision!
